Before You Start Baking!
Some Things I Wish I Knew Before I Started!
There were so many terms I’d never heard of! Or how about learning to convert your favorite all-purpose flour recipes to fresh flour recipes? There’s things to know! I hope this makes your journey easier!
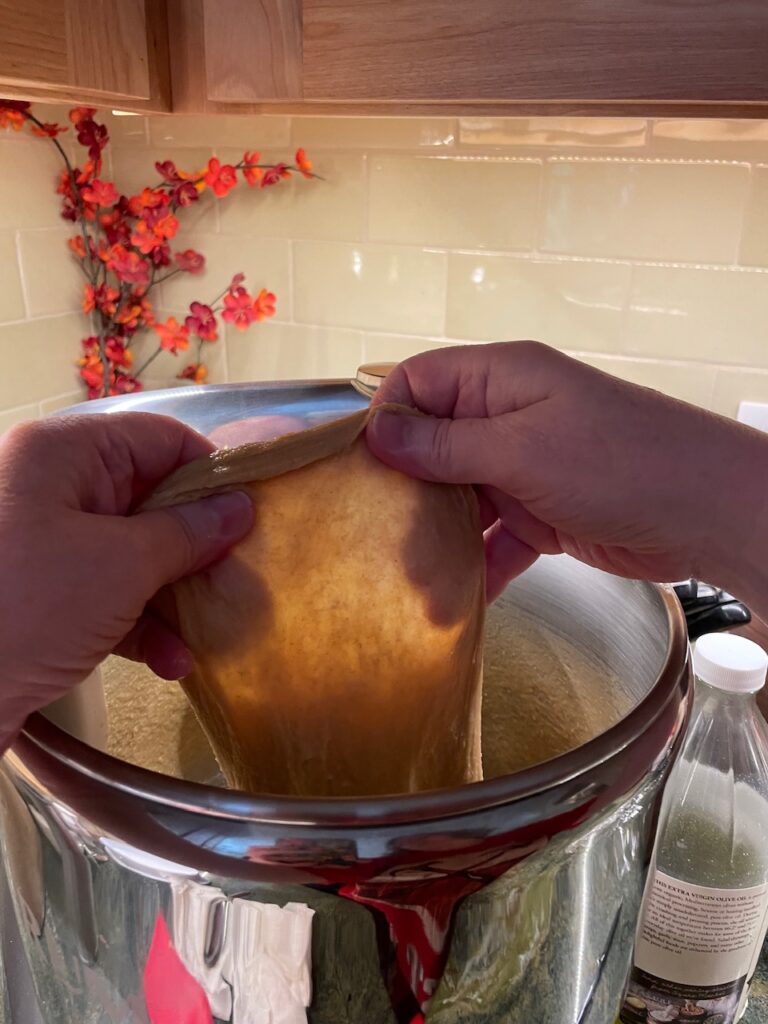
Windowpane! Windowpane! Windowpane!
When you think your bread dough is kneaded well enough, gently stretch a portion of it to see if you can make it stretch thinly enough to see light through it without it ripping. It actually feels stretchy! I use damp hands to prevent sticking. Some doughs are quite firm, like bagels, and you need to fuss with it a bit more.
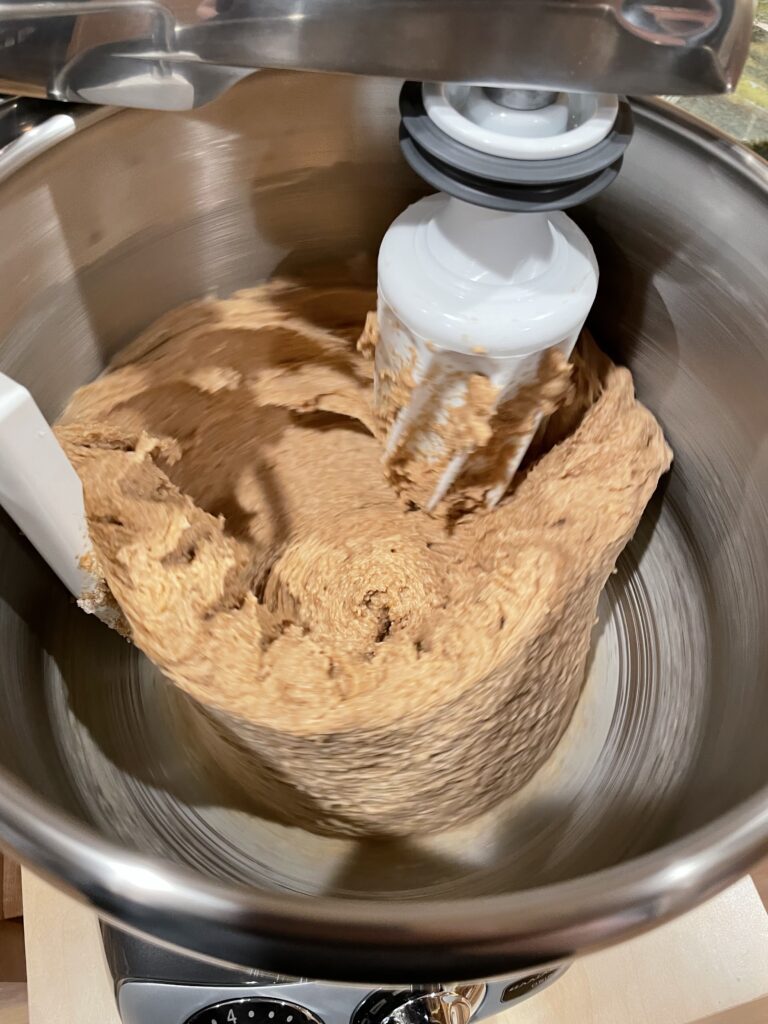
This is simply a way to know that your gluten has formed during the kneading process! IGNORE recipes that tell you to knead for specified periods of time because there is NO way of knowing how long it will take! There are so many factors: grain type, humidity, the mixer you are using, and so much more.
When I see people saying they keep getting bread that is crumbly, it’s usually because they followed the kneading time instead of watching the dough. On new recipes, I follow the time but use it as a checkpoint. I check for windowpane at that point. If I am nowhere near windowpane I might set my mixer for 8 more minutes. If I am close to windowpane I will set it for 3-4 more minutes. I do this repeatedly, it has taken 20-25 minutes sometimes!
Autolyse
Did you know you should soak your flour for the best results? I didn’t either! LOL. With breads, you will see recipes add all ingredients except the yeast, then do the autolyse. THEN you add the yeast and start kneading!
A lot of the recipes I follow say you should autolyse for 15 minutes to 2 hours! I can tell you that I almost never soak for more than 15 minutes and it works out just fine! But let’s say you start your bread making right before picking the kids up from school, it’s no problem to let that autolyse go for quite a while!
DON’T FORGET THE YEAST! I like to get my ingredients mixed (you shouldn’t have any dry flour) then sprinkle the yeast on top of the dough and cover the bowl! Covering the bowl is an important step for autolyse so things don’t dry out. After 15 minutes, it’s ready to start kneading!
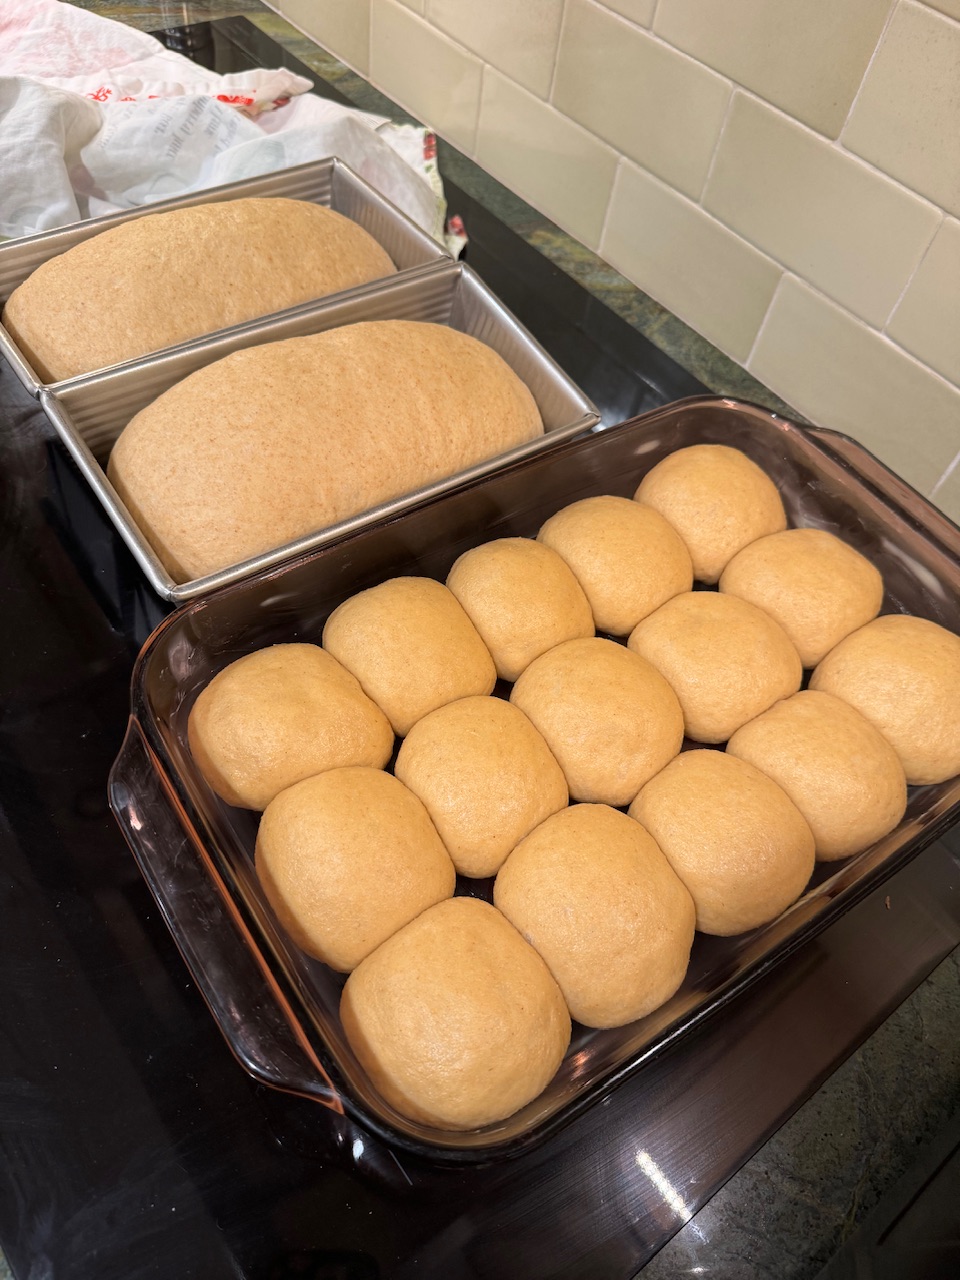
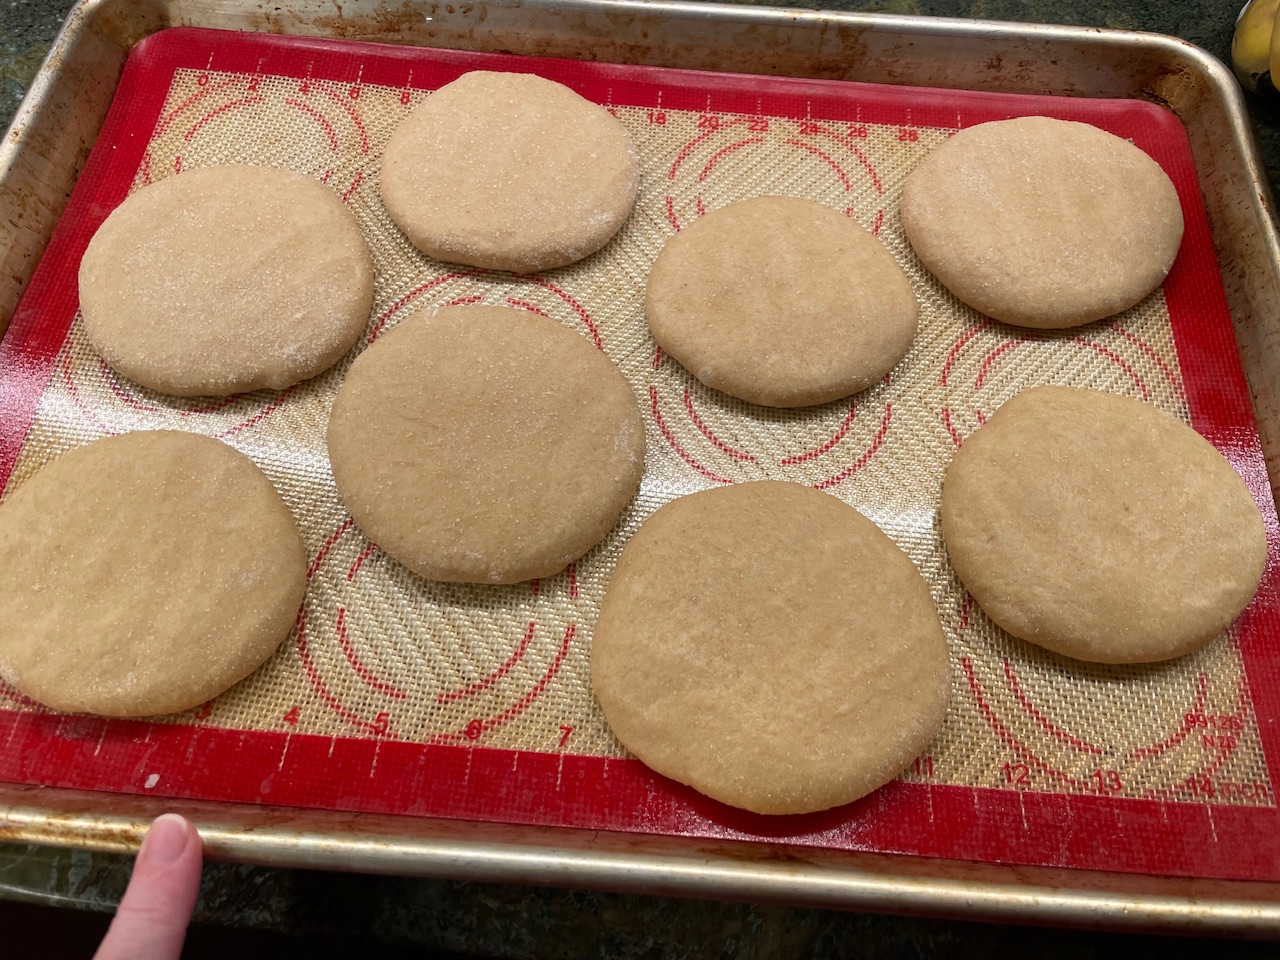
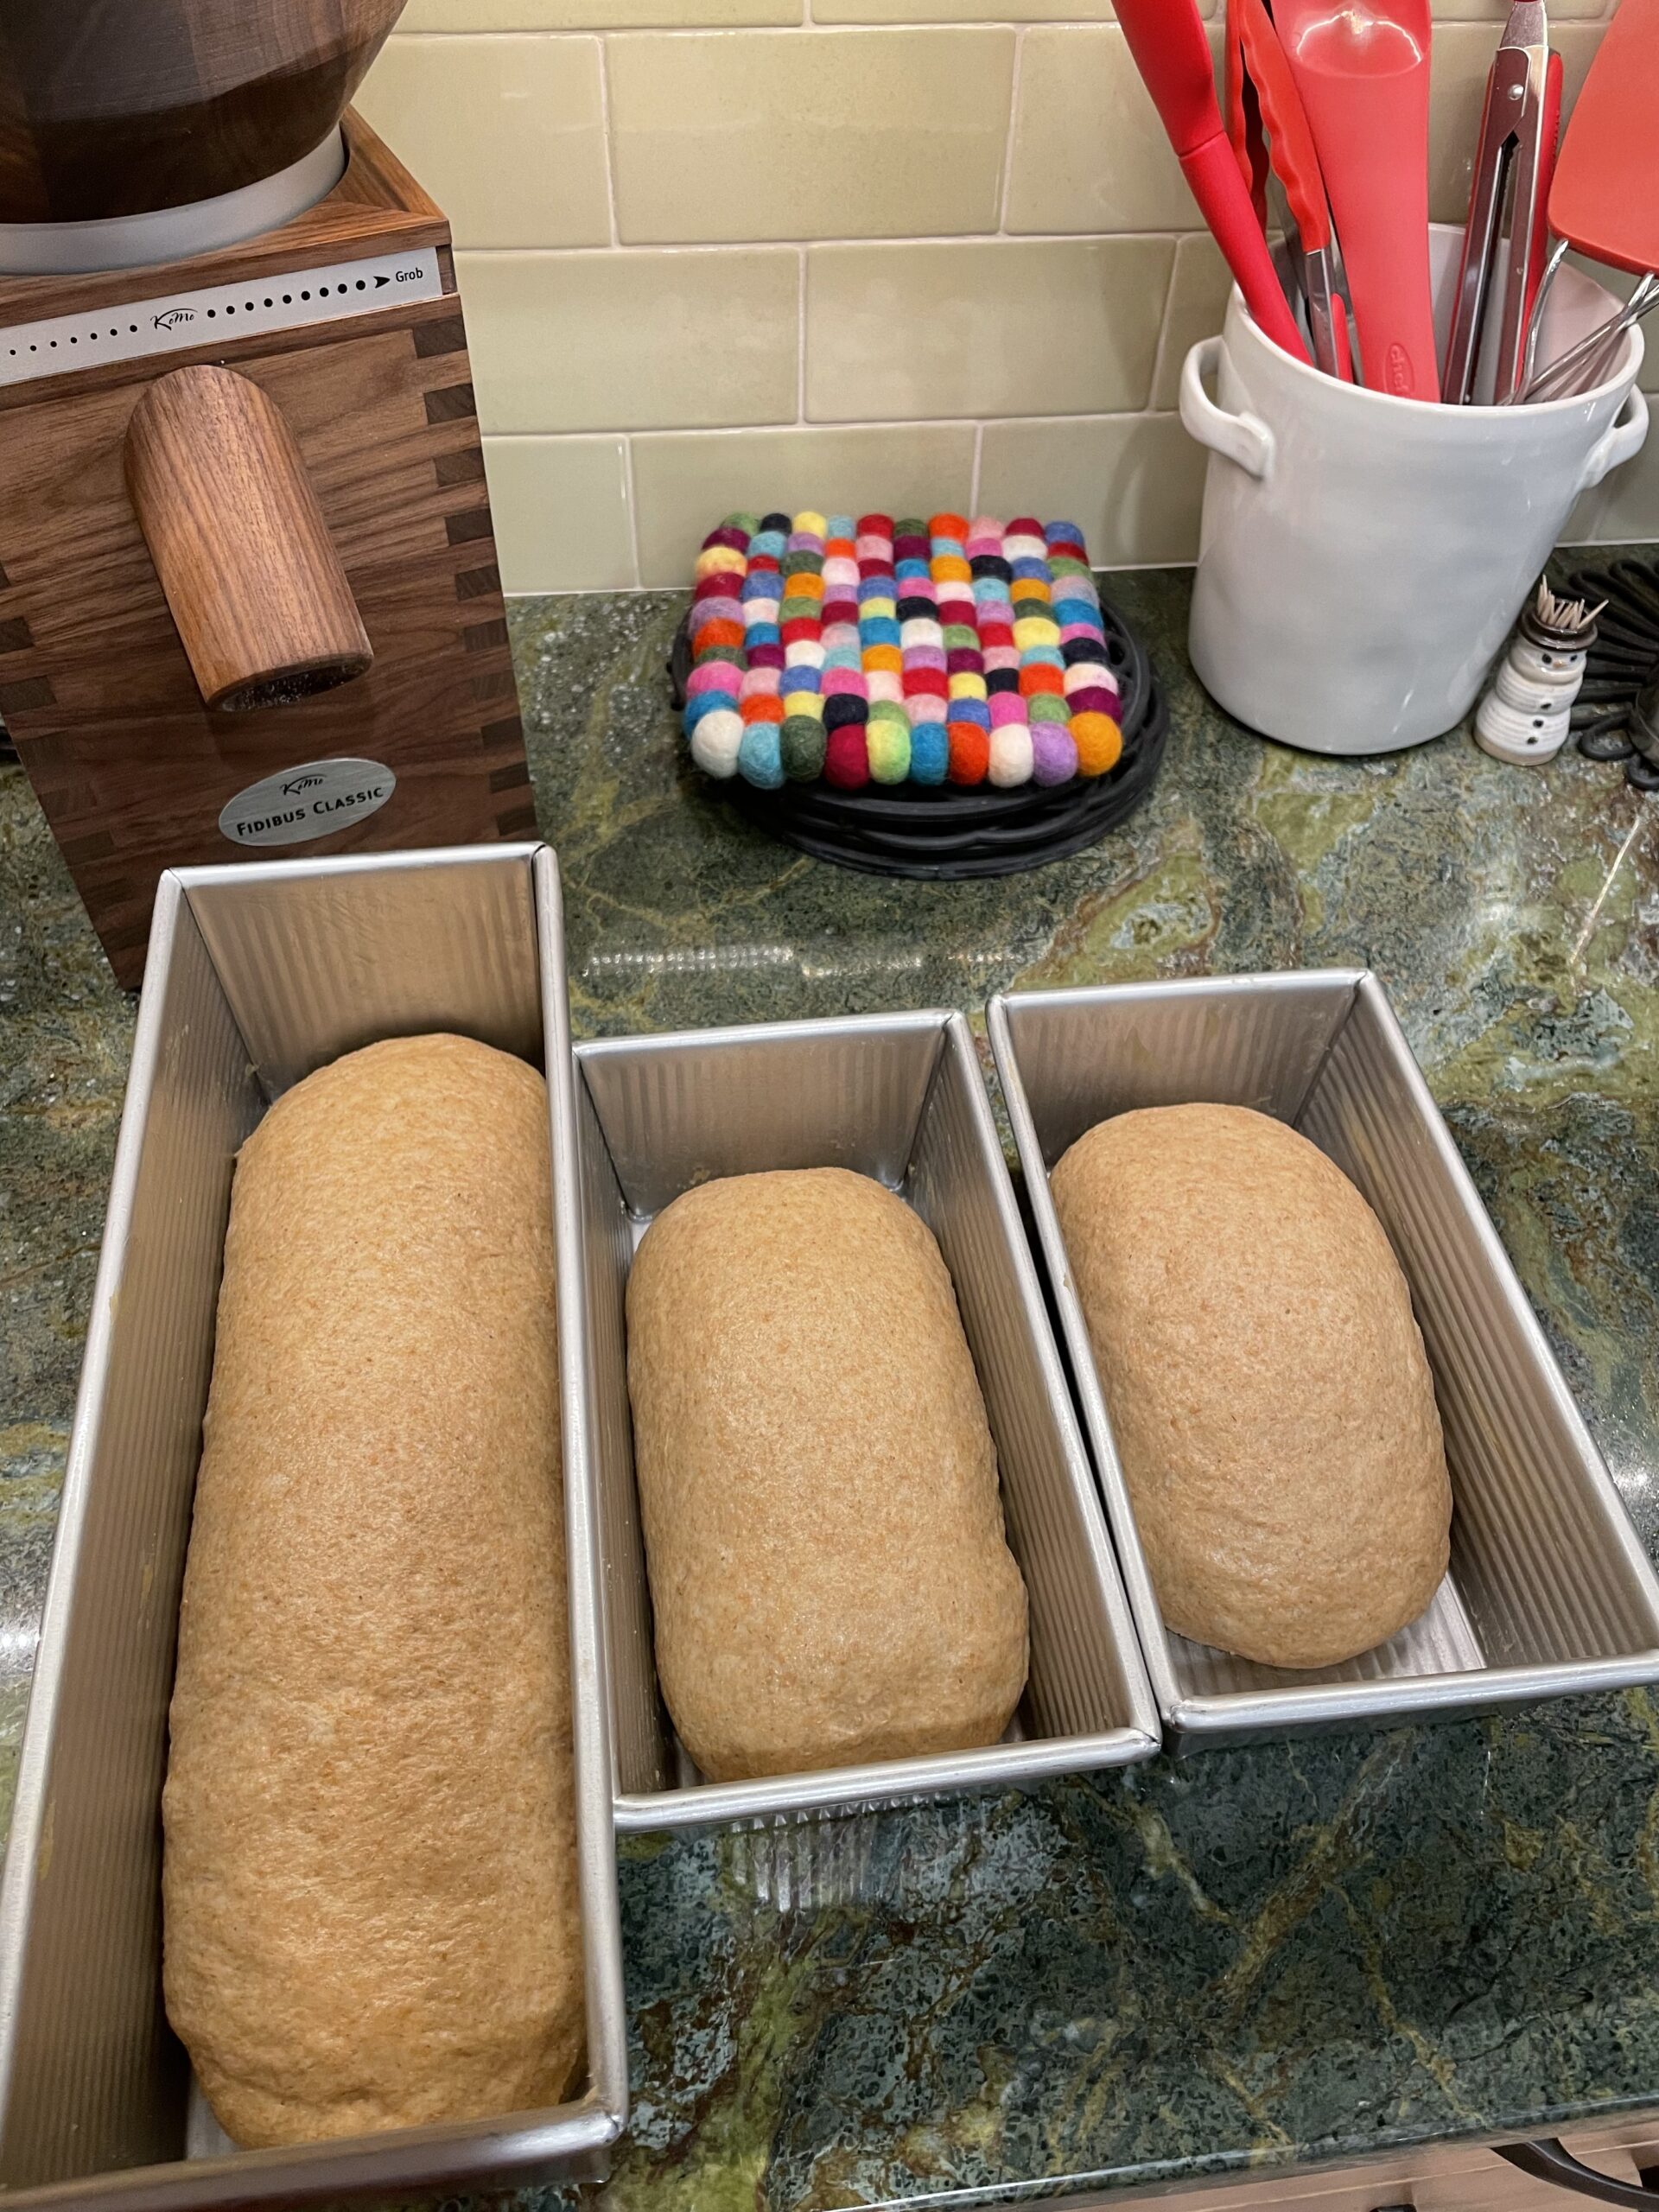
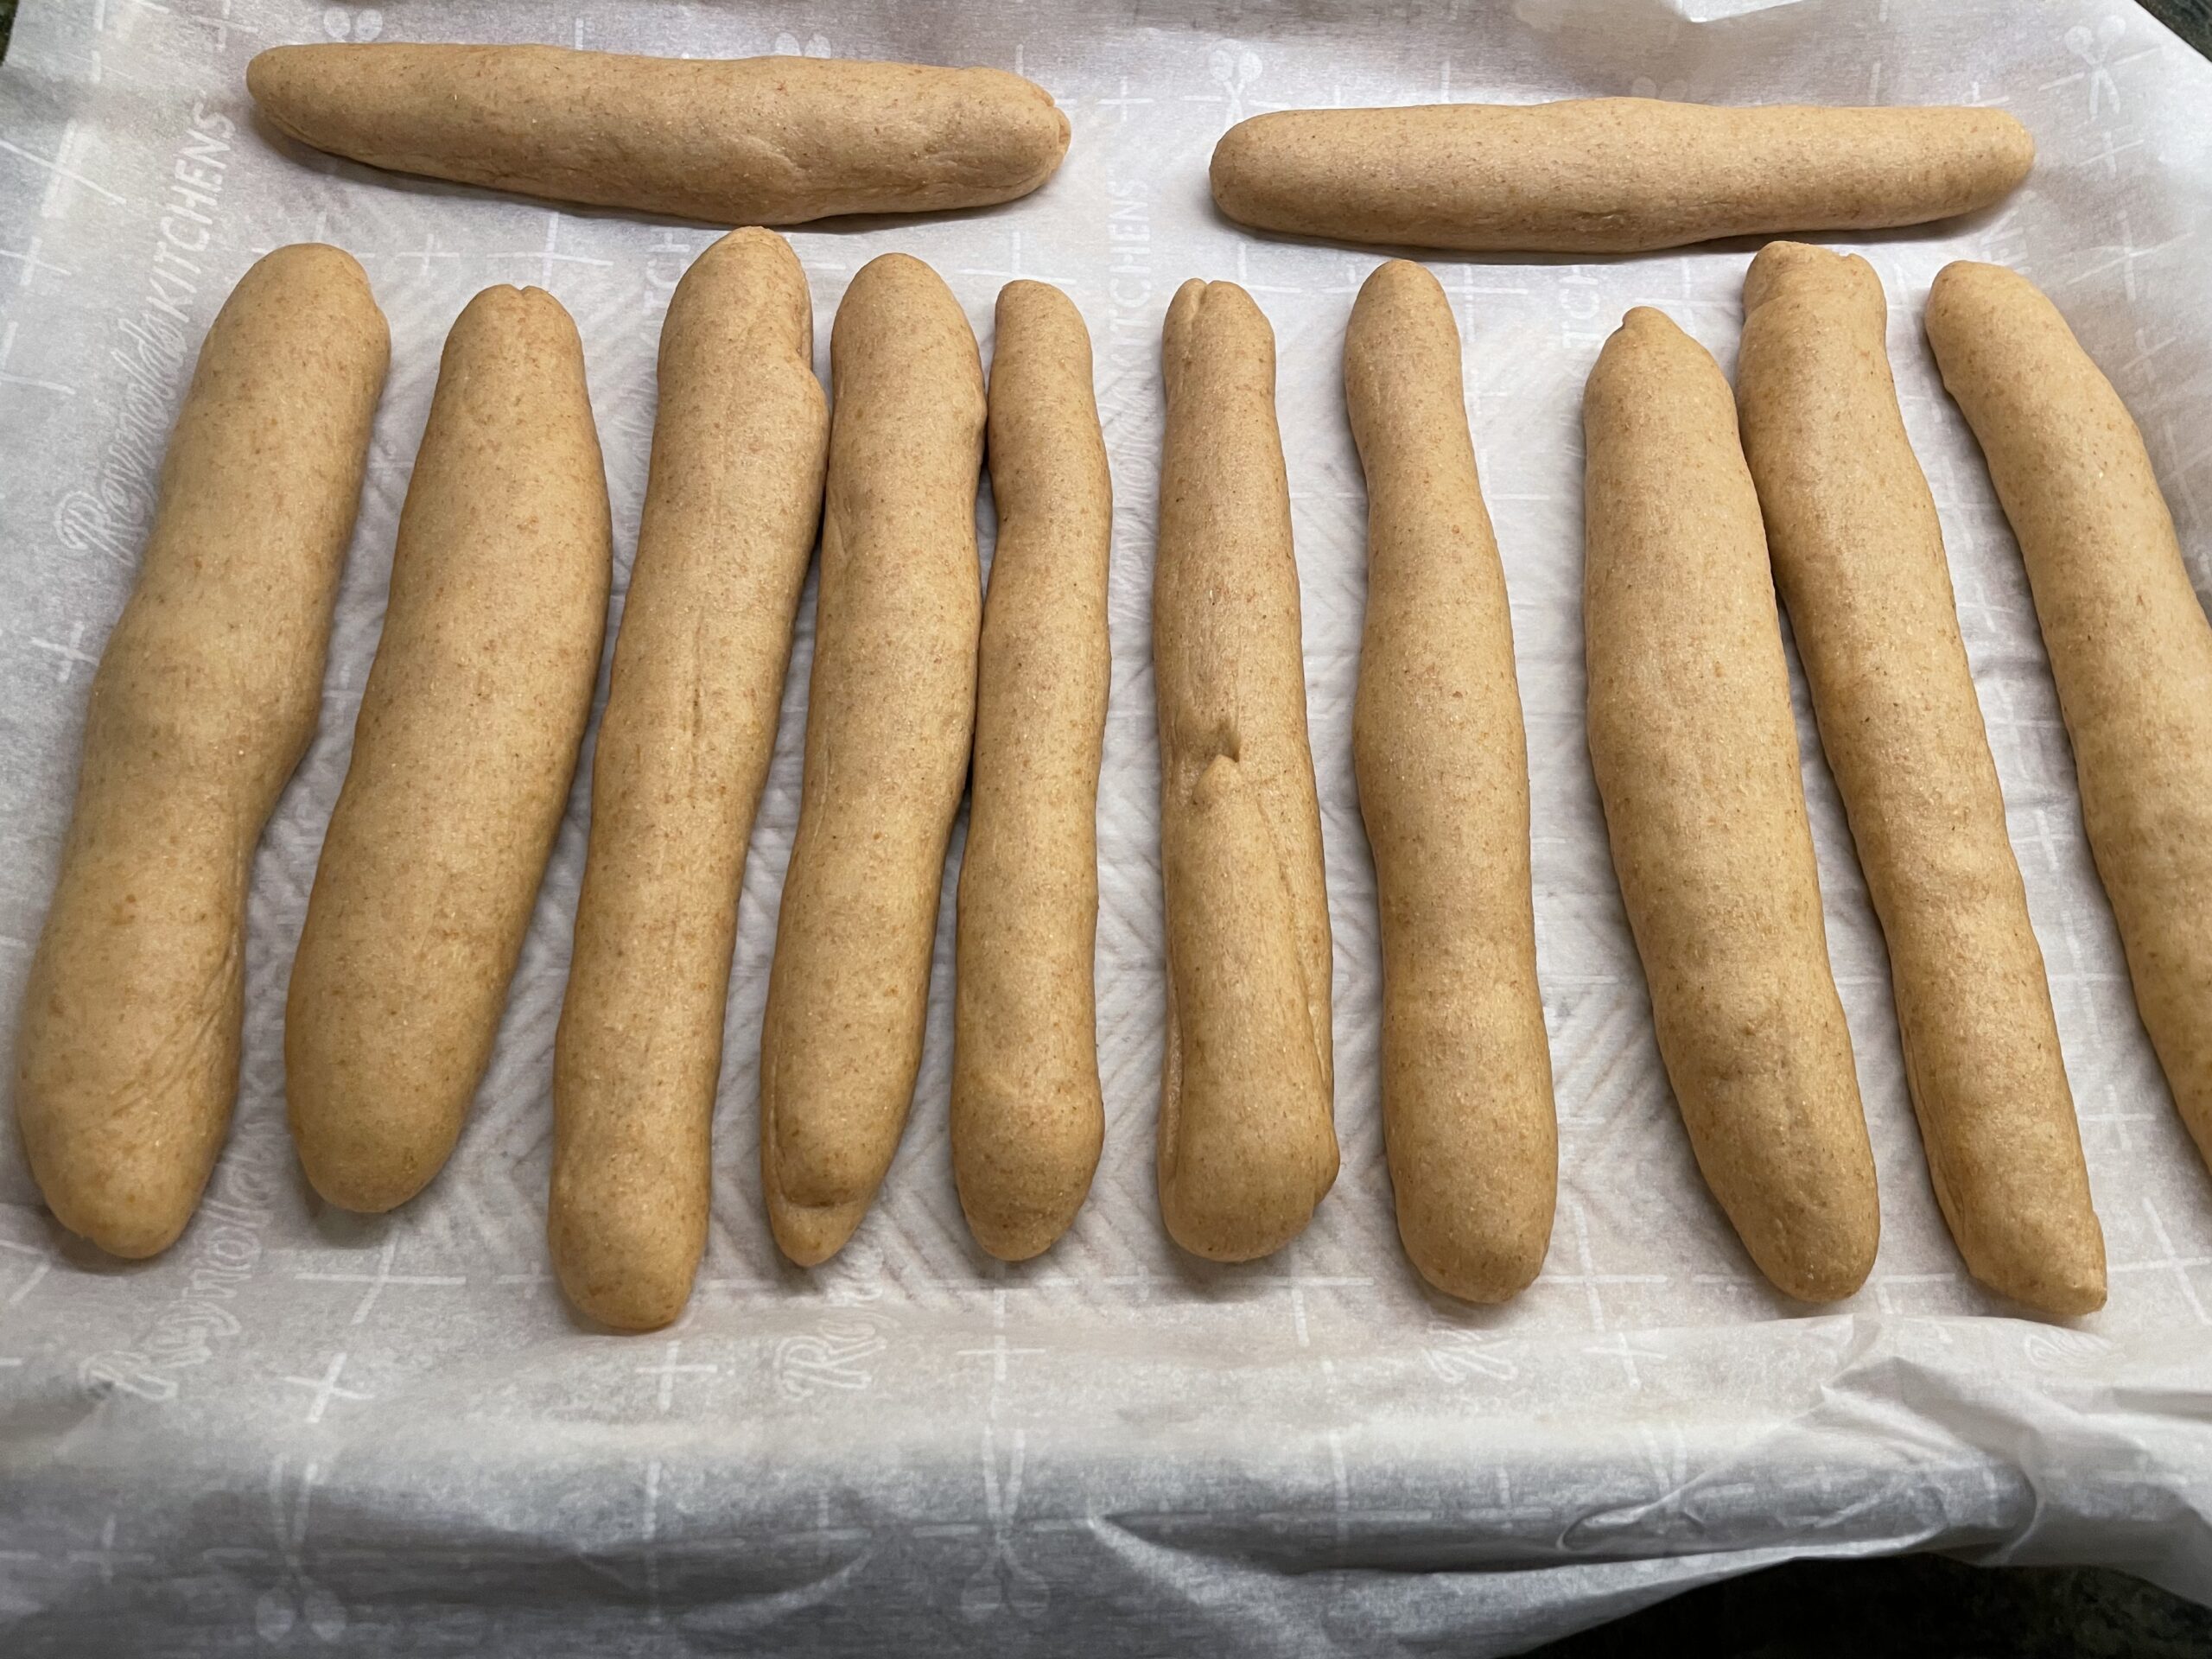
Learn to Shape Dough
There’s an art to shaping dough and it plays an important role! I have found that I am much faster with it after lots of practice so don’t give up if you find it time consuming. Getting the surface to be stretched smooth will help it maintain the shape you are going for, whether it’s bread loaves, dinner rolls, hamburger buns, or breadsticks! Here is a great video to show you how to shape a loaf of bread. And here is one for dinner rolls! English muffins and hamburger buns are similar but then you smash the dough balls! The breadsticks pictured here were made by my kids. They don’t have to be perfect, the tension on the surface is the key. For example, if you rolled out a rectangle of dough and cut it into strips, your breadsticks would have a completely different shape and texture than they would if you spent time shaping each one.

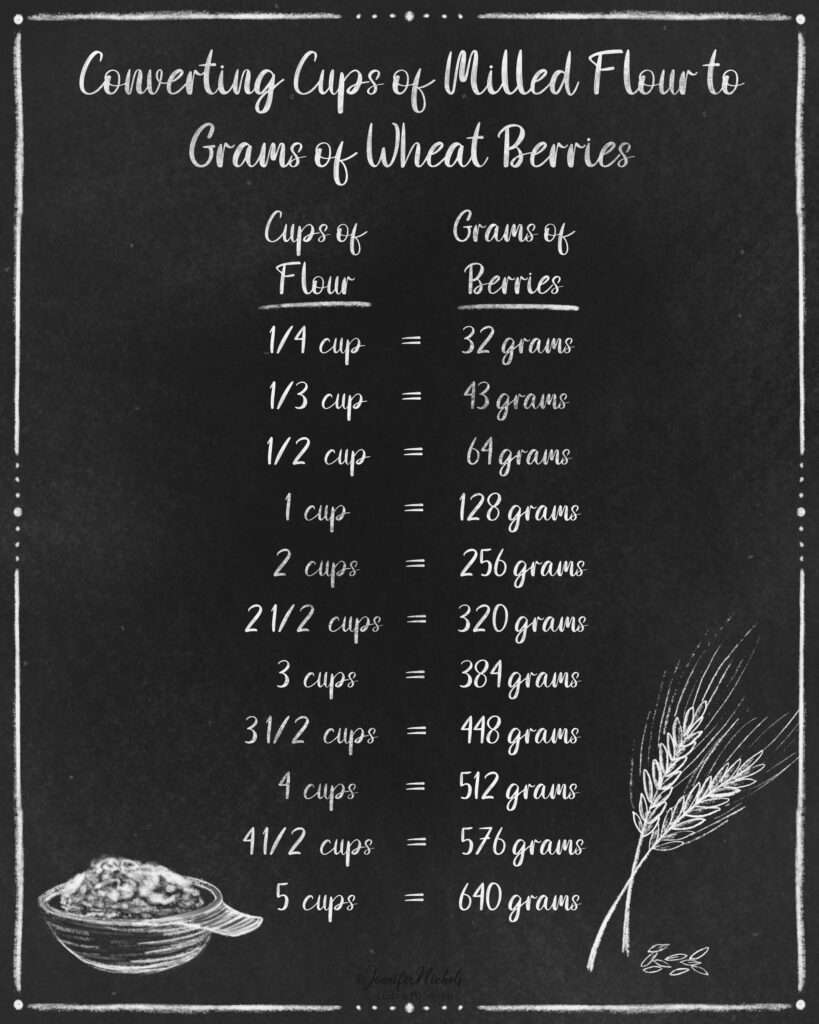
Converting Recipes
There are so many types of wheat and they all have different characteristics. For example, some are better for bread, others are better for cookies! I found it much easier to follow recipes that are made for freshly milled flour when I was first starting out. Here’s a site with some great information about converting flour though! I wasn’t a bread-maker before I started milling so I only use FMF recipes for all of my breads and don’t have advice on this. But I did make a lot of muffins and cookies before I started milling. I was very surprised to learn that I couldn’t simply use my old recipes as is. Cookies turned out flat and wide. Muffins were flat. It was a mess. Soft white berries are typically used in recipes like this so when I use an old “dead flour” cookie recipe, I use MORE fresh flour. Typically, I see people using 1/4 cup more fresh flour per one cup of dead flour that the recipe calls for. ALSO, if your recipe has baking powder in it, use a bit more of that too! Experimenting is the key.